When adding a File Upload question to an opportunity, administrators can configure which file types applicants see when selecting a file from their computer.
The Accepted File Categories setting allows administrators to choose predefined file categories or specify custom file extensions. This helps guide applicants toward uploading the correct file type.
Note: This feature does NOT restrict a file upload of a different type from being uploaded. Applicants could navigate to or drag and drop a file with a different extension into the file upload field. However, this is less likely since they are only shown files of the specified extension(s).Administrator View - Requirements Page
Step 1: Open the File Upload Settings
On the opportunity's Requirements page, locate the File Upload question and click Settings.

Step 2: Configure Accepted File Types
In the General section of the configuration panel, locate the Accepted File Categories setting.
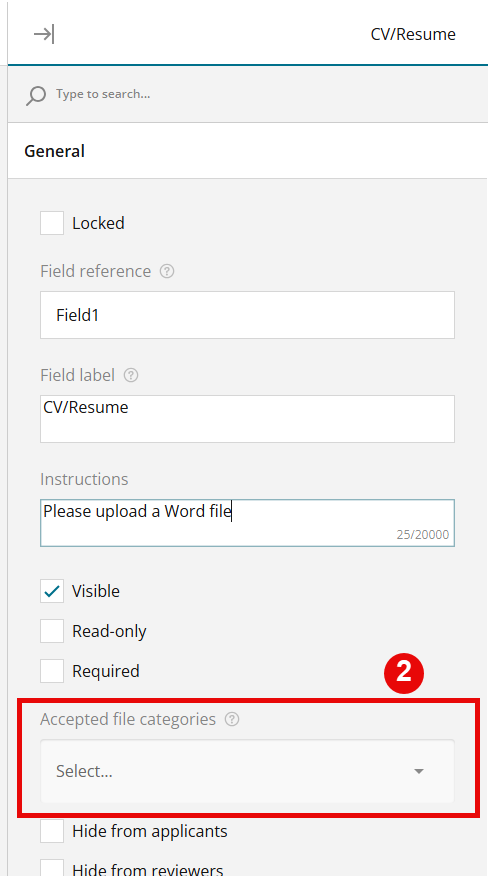
Select the appropriate category:
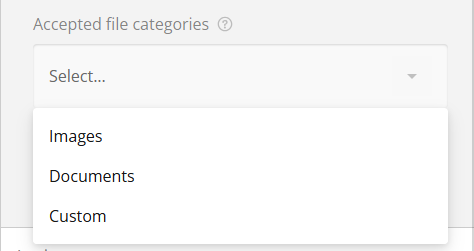
Images: Allows applicants to select supported image file types, such as JPG, JPEG, and PNG.
Documents: Allows applicants to select supported document file types, such as PDF, DOC, DOCX, XLS, XLSX, PPT, PPTX, TXT, and RTF.
If you only want to allow Images, select Images. You can also allow both Images and Documents.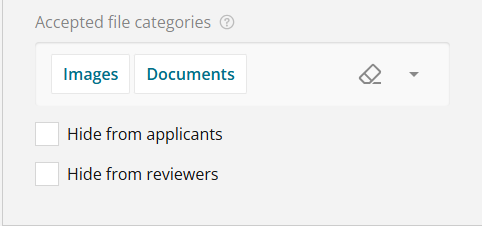
To remove a file option, click on the arrow and the select panel will open, and you can click on a choice to delete it, or use the eraser icon to remove all choices.
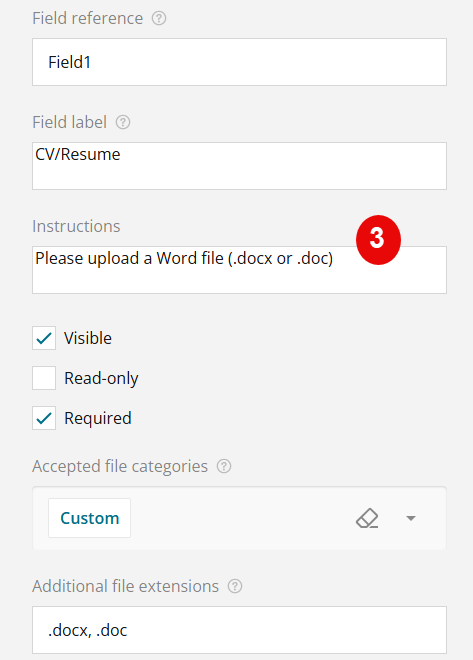
If you choose to use the Custom Option: Allows administrators to specify additional file extensions in the Additional File Extensions field.
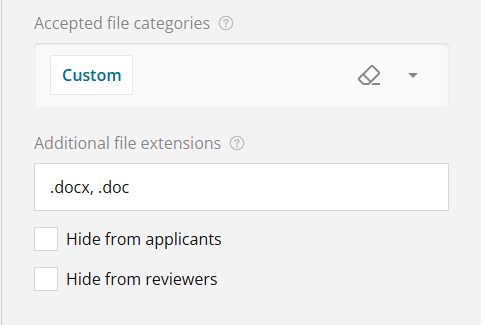
For custom file types, enter each extension separated by a comma. Include a period (.) before each extension.
For example: .pdf, .docx, .xlsx
In the field, list any desired file extensions, separated by commas. A period (.) must proceed each file type.
While any file type can technically be uploaded the most common include:
- Common file extensions include:
File type Extensions Microsoft Word .doc,.docxMicrosoft Excel .xls,.xlsxPDF .pdfImages .jpeg,.jpg,.pngMicrosoft PowerPoint .ppt,.pptx
Step 3: Add Instructions for Applicants
In the instructions field, provide any additional guidance applicants need to follow when uploading their files. You can include requirements such as:
The required document or file type
File-naming conventions
Any other instructions specific to the opportunity
Step 4: Close the Configuration Panel
When you have finished configuring the settings, click the arrow at the top of the panel or click the main area of the form to collapse the configuration panel.

Applicant View
- When applicants reach the question on the form, they should read instructions and then click Choose file.

- The applicant's files will open and be filtered to show only the specified extension(s).
- Depending on web browser and the file folder last viewed, the screen may look slightly different.
- The applicant can then select a file and click Open or simply double click the file to attach it to their application and be returned to the form.

- The uploaded file name will display in the middle of the screen.
- Before submitting, applicants can:
- A - Replace the file
- B - Remove the file

Have more questions about this topic? Go to the Community Forum to pose the question to other users or submit a support ticket to InfoReady.