If SSO (Single Sign-On) is enabled on your site but new SSO users are receiving a Set Password email instead, Super Administrators (or Global Admins when microsites are enabled) should edit a setting in the Admin section that will send a notification directing new SSO users to the institutional log in page (instead of the Set Password email).
Steps to Add SSO Domain(s)
- Click the Admin tab.
- Click the Configure System button on the right.
- Click the Add Domain button under the Single Sign-On (SSO) Domains section to add your institution's email domain as an allowable email domain.
- Type in the SSO domain.
- Click Save.
*If you want to force any users with this email domain to sign in via SSO (recommended), make sure to check the box next to Enforce SSO for your organization's users.
Note: If your institution uses email aliases, you may need to add multiple subdomains. For example, formats like university.edu, cla.university.edu, eng.university.edu, etc.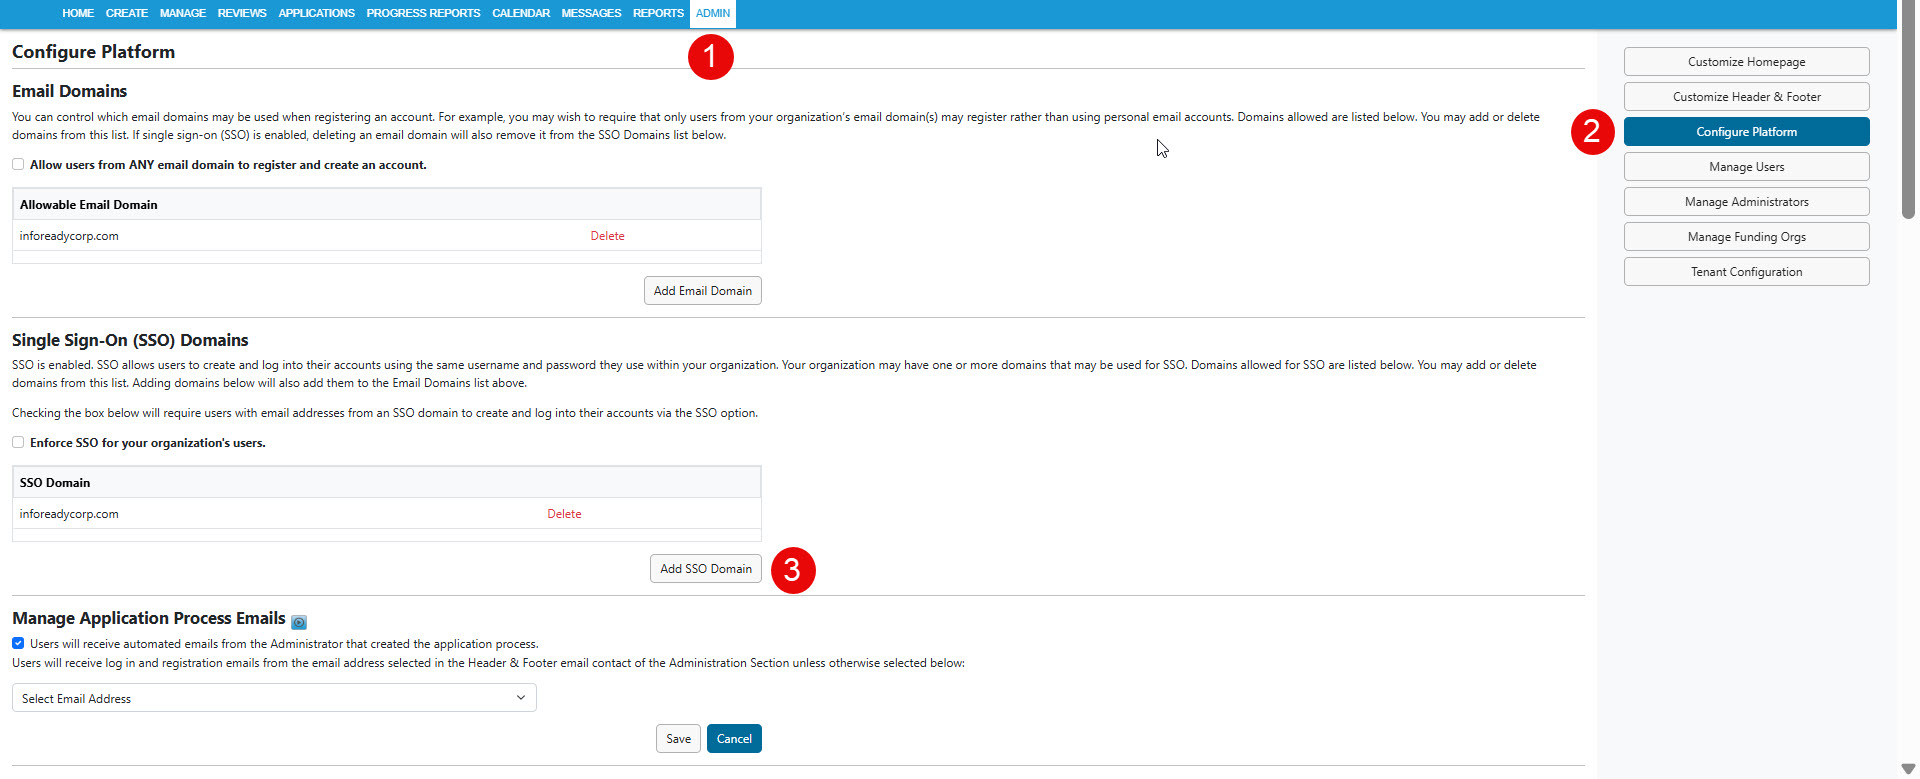

Have more questions about this topic? Go to the Community Forum to pose the question to other users or submit a support ticket to InfoReady.